Fuel Tank Making
1. Join the group

Zeran Wang (Industrial Design)
Tauqir Ullah (Industrial Design)
Lornia Shi (Industrial Design)
Kelvin Ip (Architecture)
Benjamin Le (Industrial Design)
Zoey Song (Architecture)
Natalia Dou (Interior Architecture)
Jin Son (Industrial Design)
Jeremy Hizkia (Industrial Design)
After group discussion
We decided to do the third fuel tank (by Andrew Wallace), cause several people of our group members have the experience of 3D model making software. The third fuel tank is more convenience than other two fuel tank.

2. Preparation
First time to try laser cutting, but we met a problem about using Rhino to open the 3D model files


We can not open the files from the website and we try different software (Solid works, Rhino,360 Making, etc)


So we asked Russell for help, he said the files need to use Grasshopper Plugging during Rhino.
Then he shows us how that works.
 |


Through 40mins 'hard-working' we finally get the laser cutting plants.
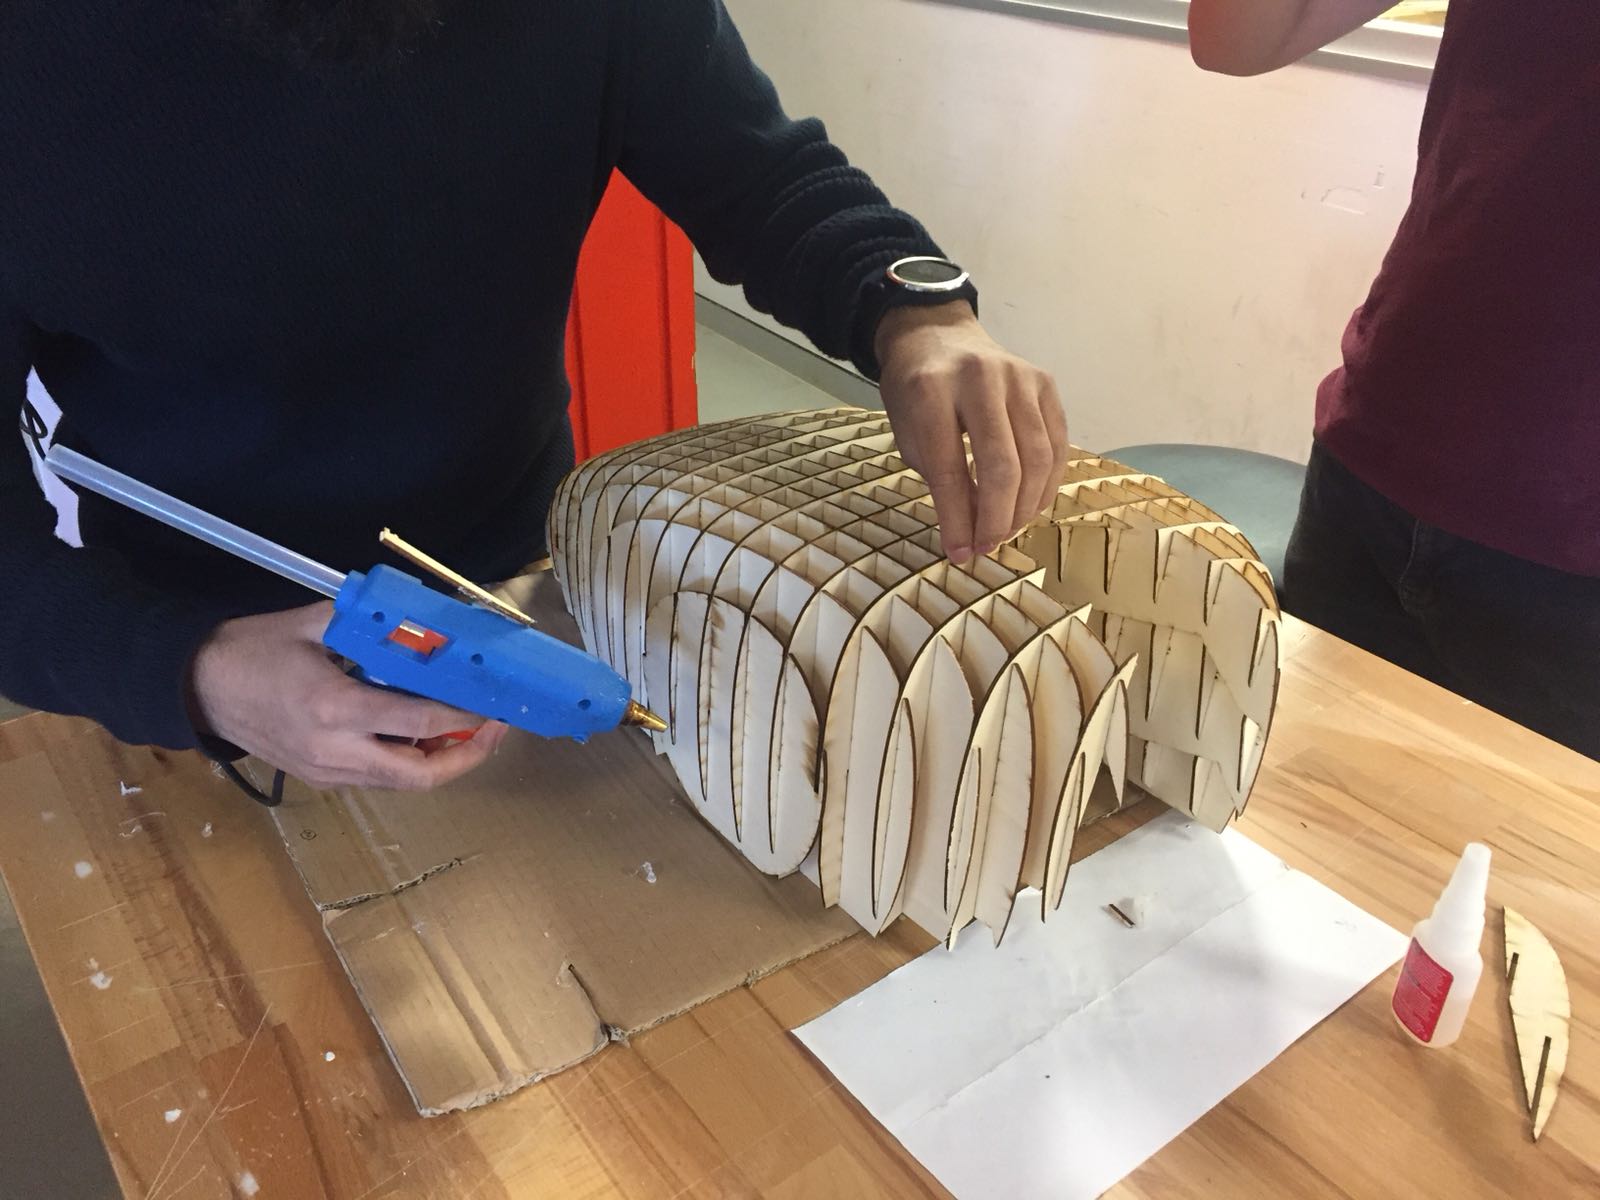
3.First time cutting


We rearranged the graphs with Adobe Illustrator then booking the laser cutting time schedule.
It's time for cutting !!!!
 |
| Test cutting (test the gap with 2.6mm) |
Then we decide to cut the panels with the 2.6mm gap.


When we spliced the panels together we found some problems. 1. Some panels are broken and affect the whole model 2. When we laser cutting the test model we did not consider the size, so the 2.6mm gap was fitted with the small test model but it did not suitable for the tank, it was too tight.


Before we re cutting the panels, we decided to do the pattern making. So we use the paper(it operates much the same way the aluminum does) and masking tape to get an approximation of the dimensions of the panel we are going to shape.
4 Second time cutting(16th May)


Laser cutting again very exciting!!!!


Mission completed!!!
 |
Some panels were not cutting through, so we need to use the knife to cut the pieces out of the plywood. |
Started to assemble the panels.
 |
20% |
 |
40% |
 |
90% |
 |
100% |

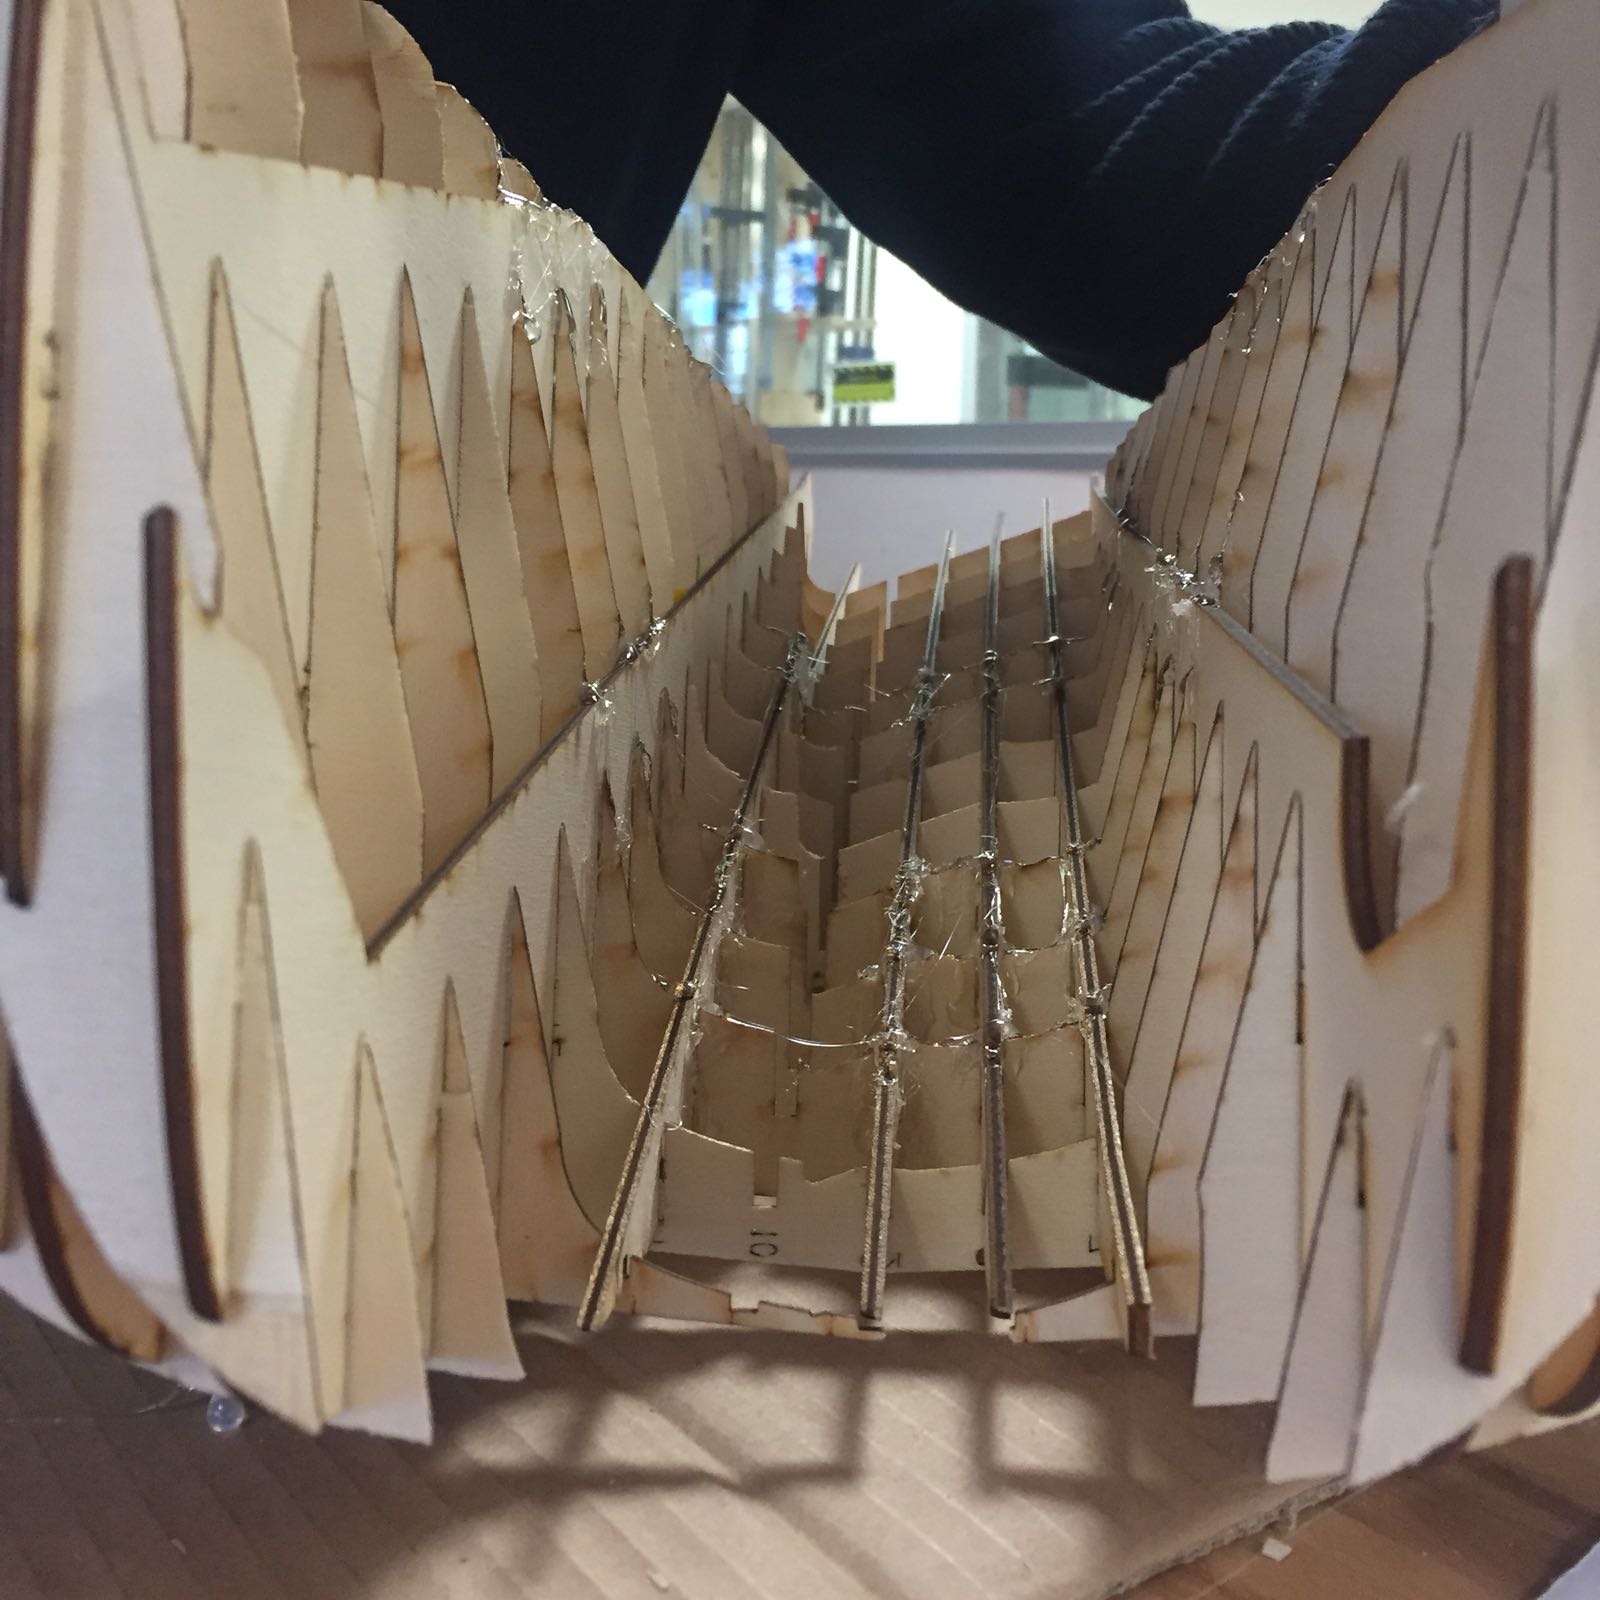
 Model finished.
5.Pattern Making
We used the masking tape to cover the whole model first.


Then used 4 A4 papers make a suitable size paper.
 Divided the model into three parts, Ben, Tauqir and I choose No.2
6.Making Aluminum skin and polish (18th May)


Cut the No.2 part of paper to dimensions the aluminum panel I going to shape.
 |
| Cutting the aluminum panel |


Using the hammer to create the general shape. Mines was litter bit higher it need to cut litter bit.


Then using English wheel to create the curve and the front part.


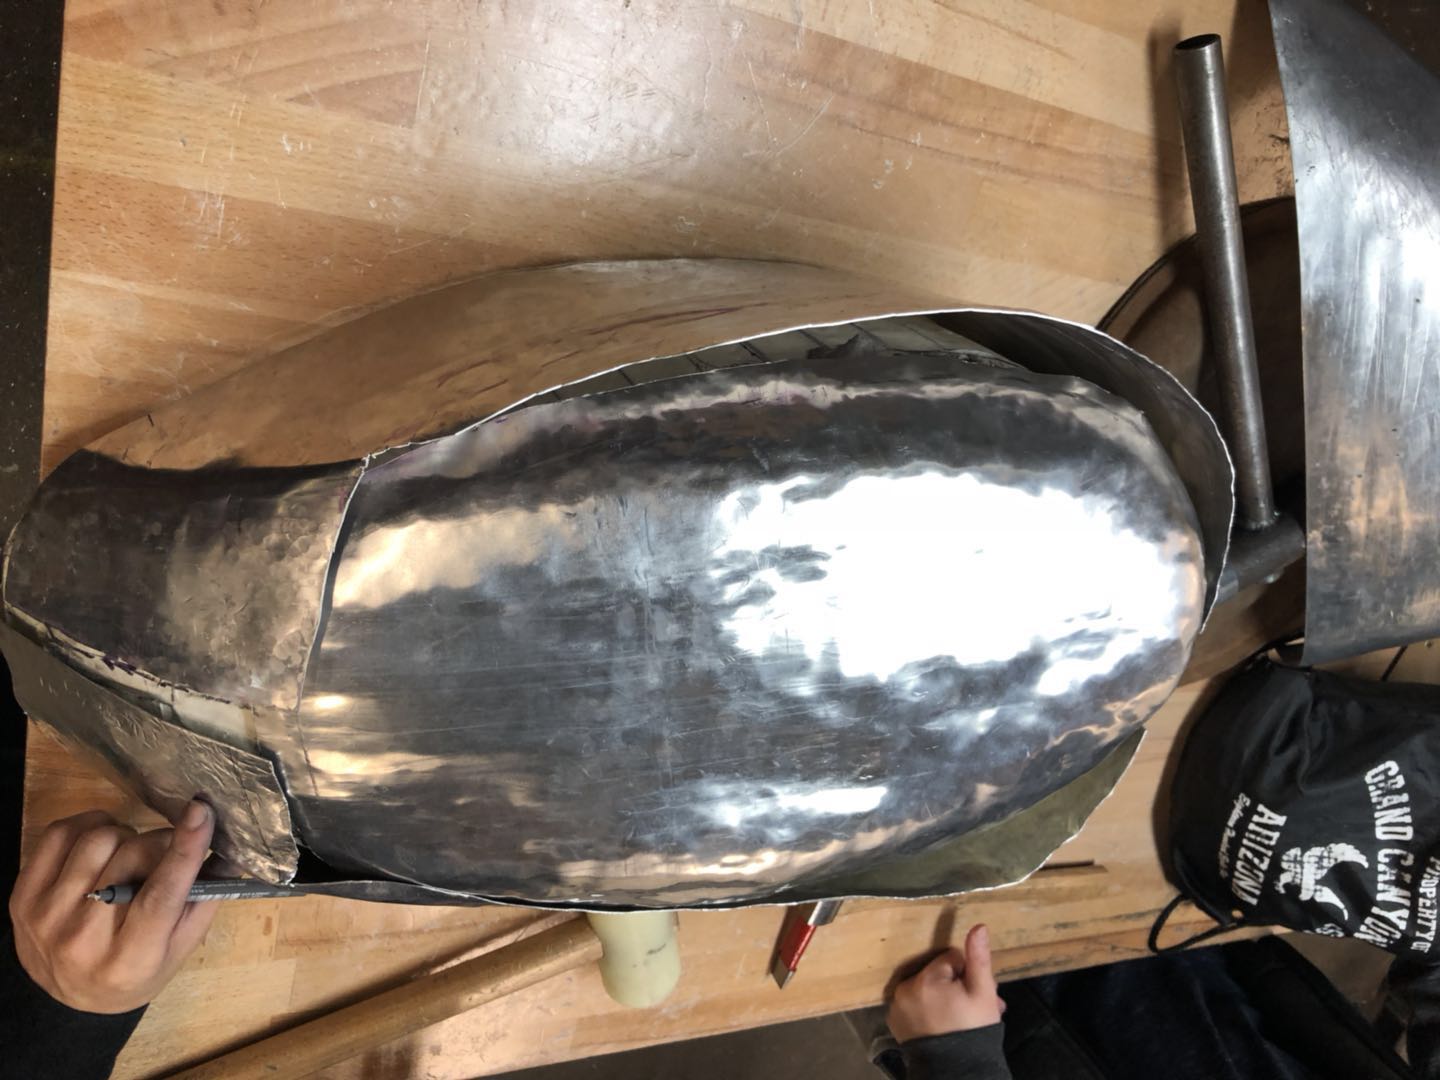
Using the hammer to improve the edges.


Sand the surface and edge with different number's sanding paper.
 |
| P320 sanding paper |

P800Sanding paper
 |
| P80 Sanding paper |
Polish


评论
发表评论